

Important Note
Signup via email can take few minutes please be with patience, but the signup via website is instant.
We provide two ways to signup on our system
You just need to write en email with the following specified format and send it to " info@medicalquestionnaire.com ", you will receive your login details that's it.
| Email Subject: | signup |
|---|---|
| Email First Line: | you email account |
| Email Second Line: | Your Full Name |
| Email Third Line: | Your Street Address |
| Email Fourth Line: | you postal code |
| Email Fifth Line: | City, Country |
| Email Sixth Line: | Mobile Number |
| Email Seventh Line: | Fax Number |
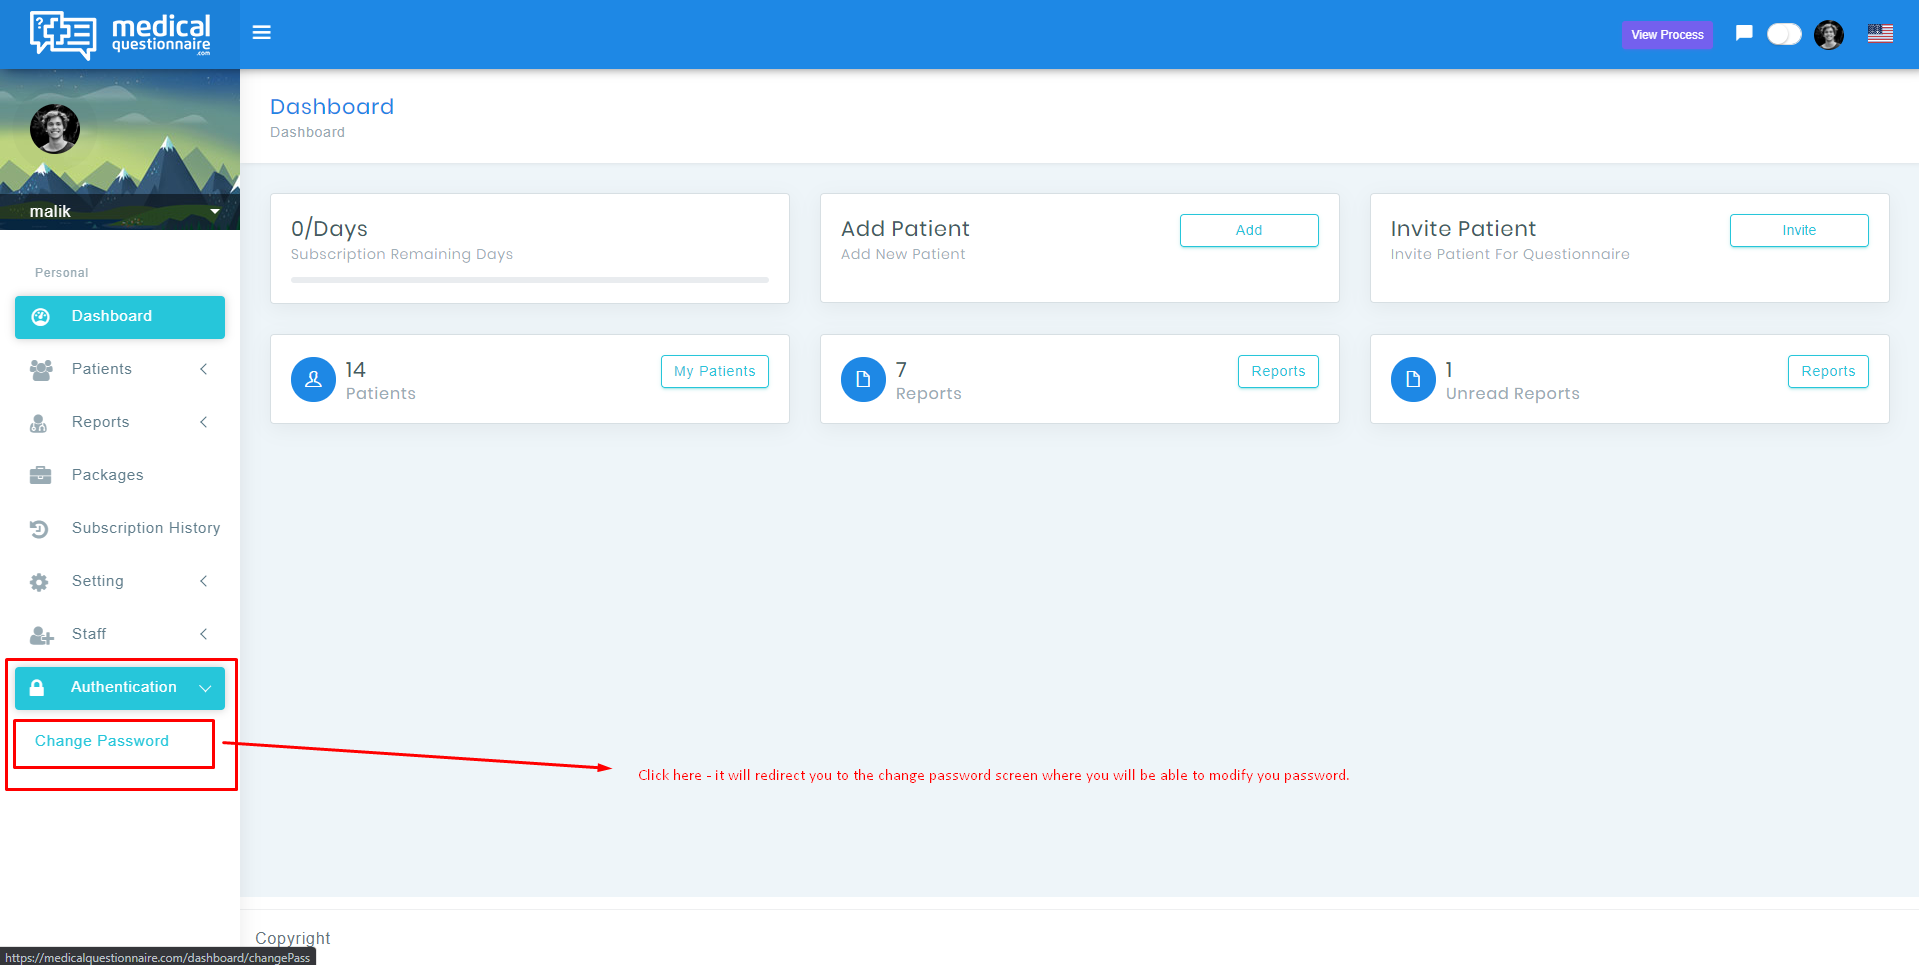
You will receive your login details along with a Random System Generated Password, after successful login with those details you will be redirected to a change password screen so that you can set the password whatever you want.
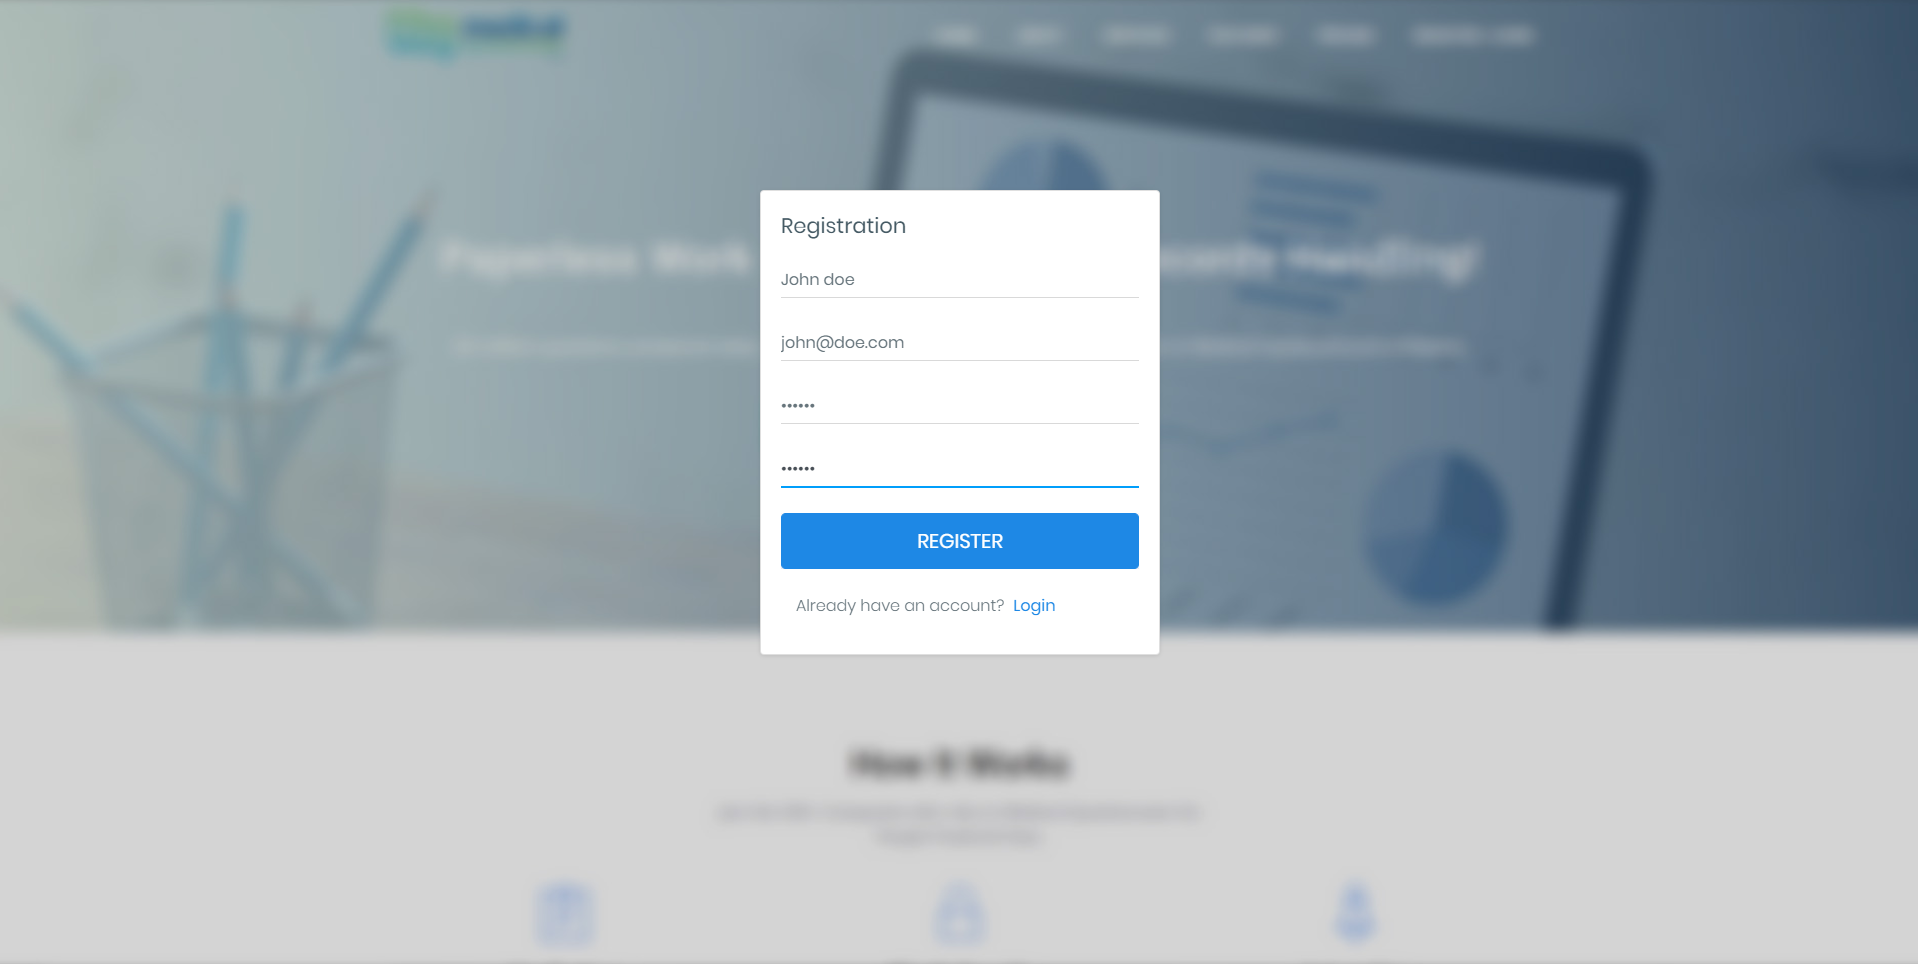
You can visit the website: https://medicalquestionnaire.com And click on register button in the top menu.
Signup via email can take few minutes please be with patience, but the signup via website is instant.
Once you received your login details and logged into your account successfully, You will be redirected to the dashboard where you will see the various Subscription plans as follow:
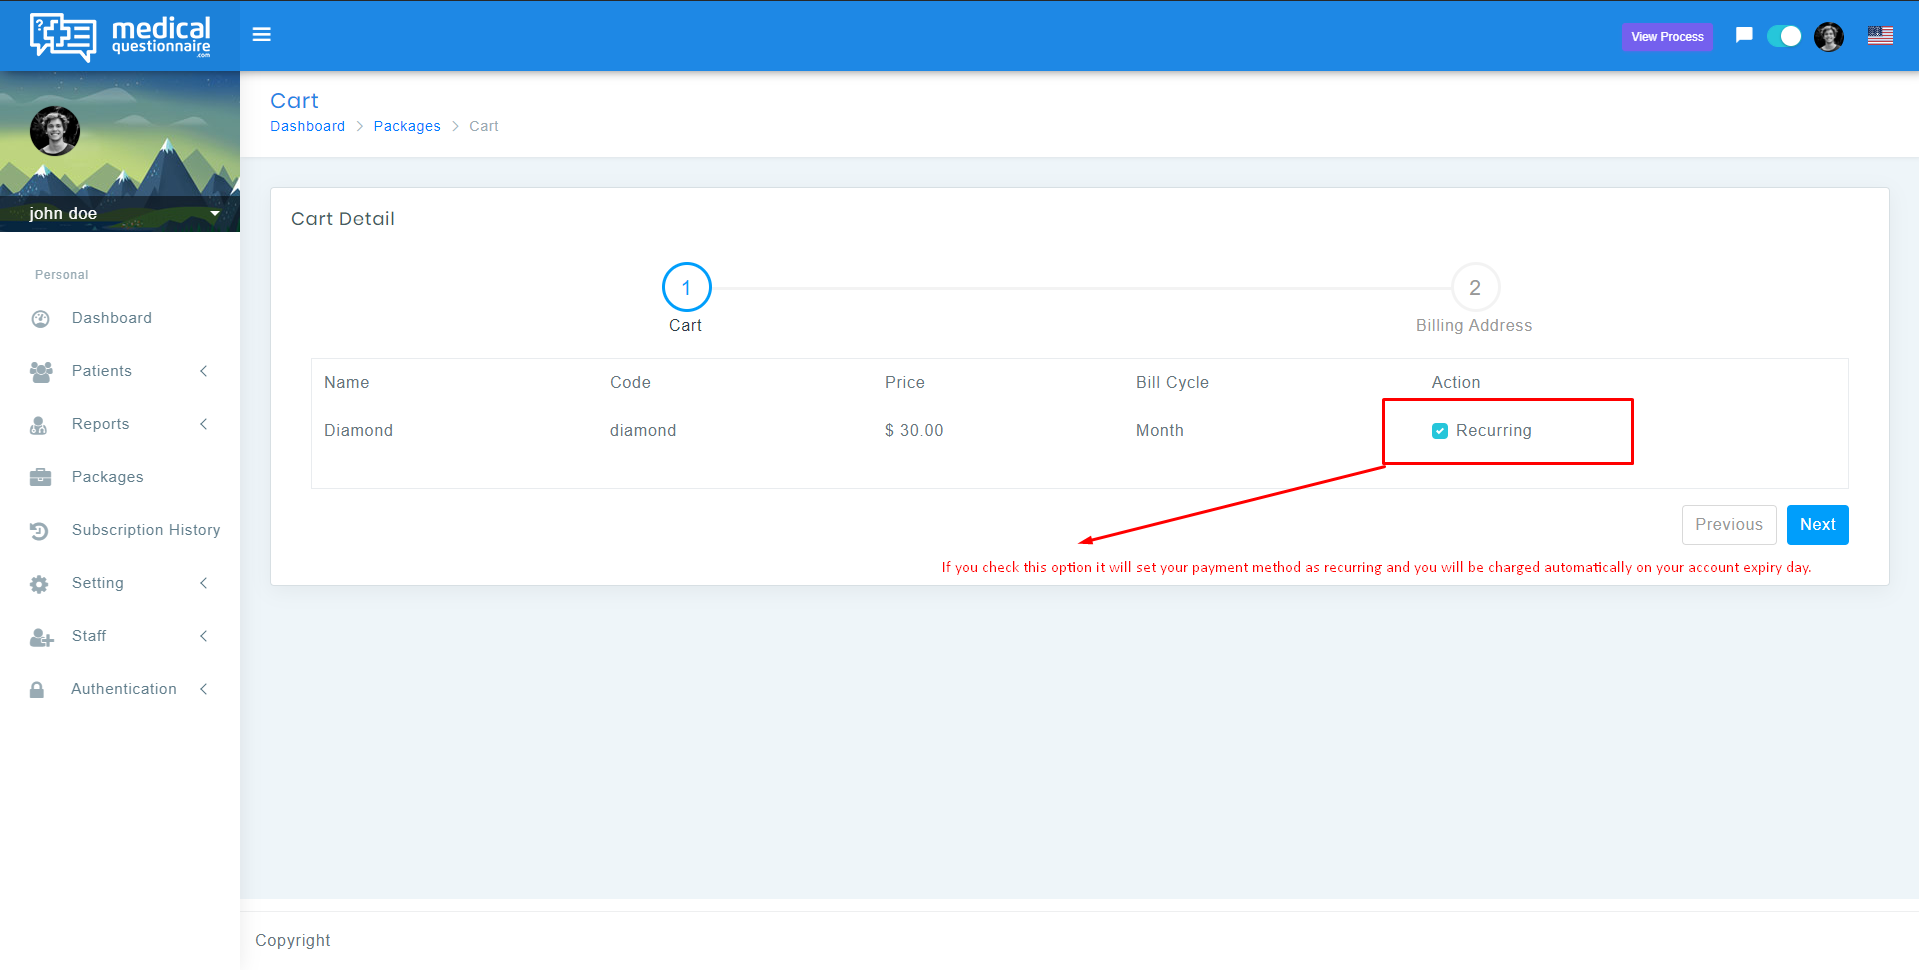
Once you select the plan which suits you, you will be on Shopping cart screen where you can enable the " Recurring " option or just simply continue if you don't want to recurring subscription and prefer to pay manually when your subscription ends.
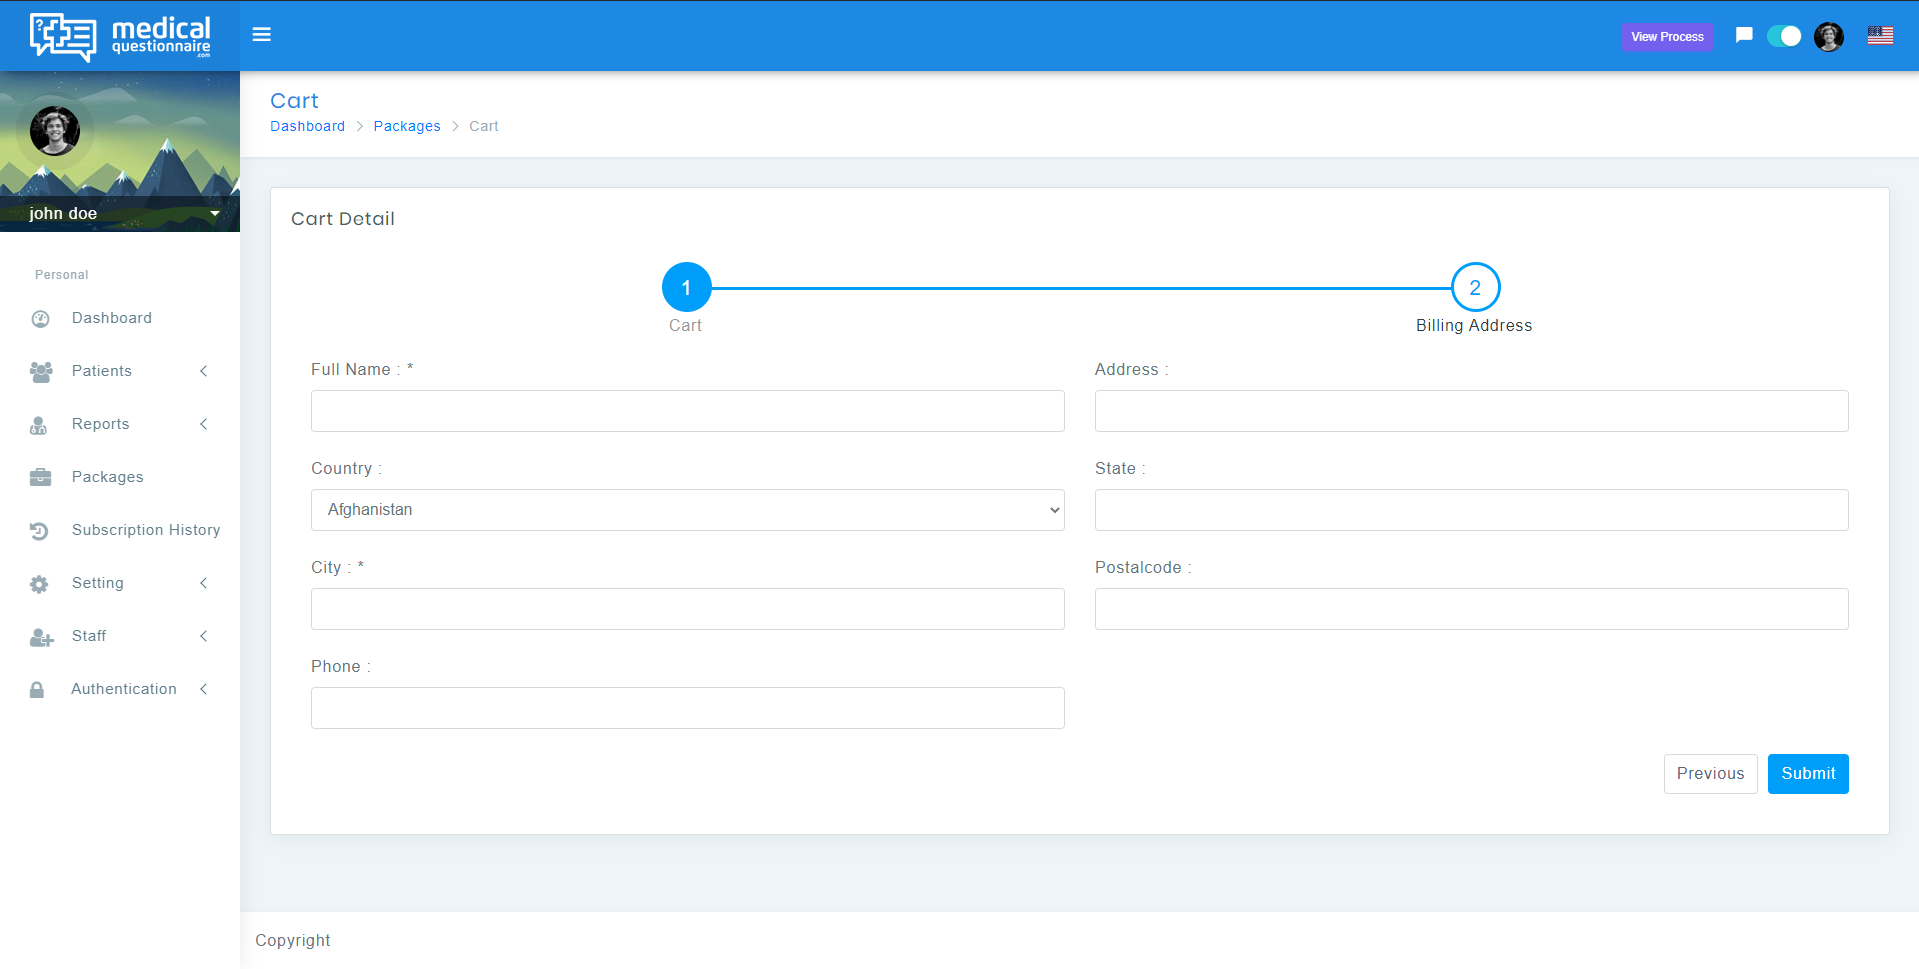
Once you press next you will be redirect on the Billing Address page where you will enter your billing details to whome the invoice will be issued, after entering all the mandatory fields please press 'Submit' Button
Once you press the 'Submit' button you will be redirect on the payment page where you will see variour available payment methods, Please select the one you feel comfortable with. After entering the payment method details you will need to press 'Pay' Button
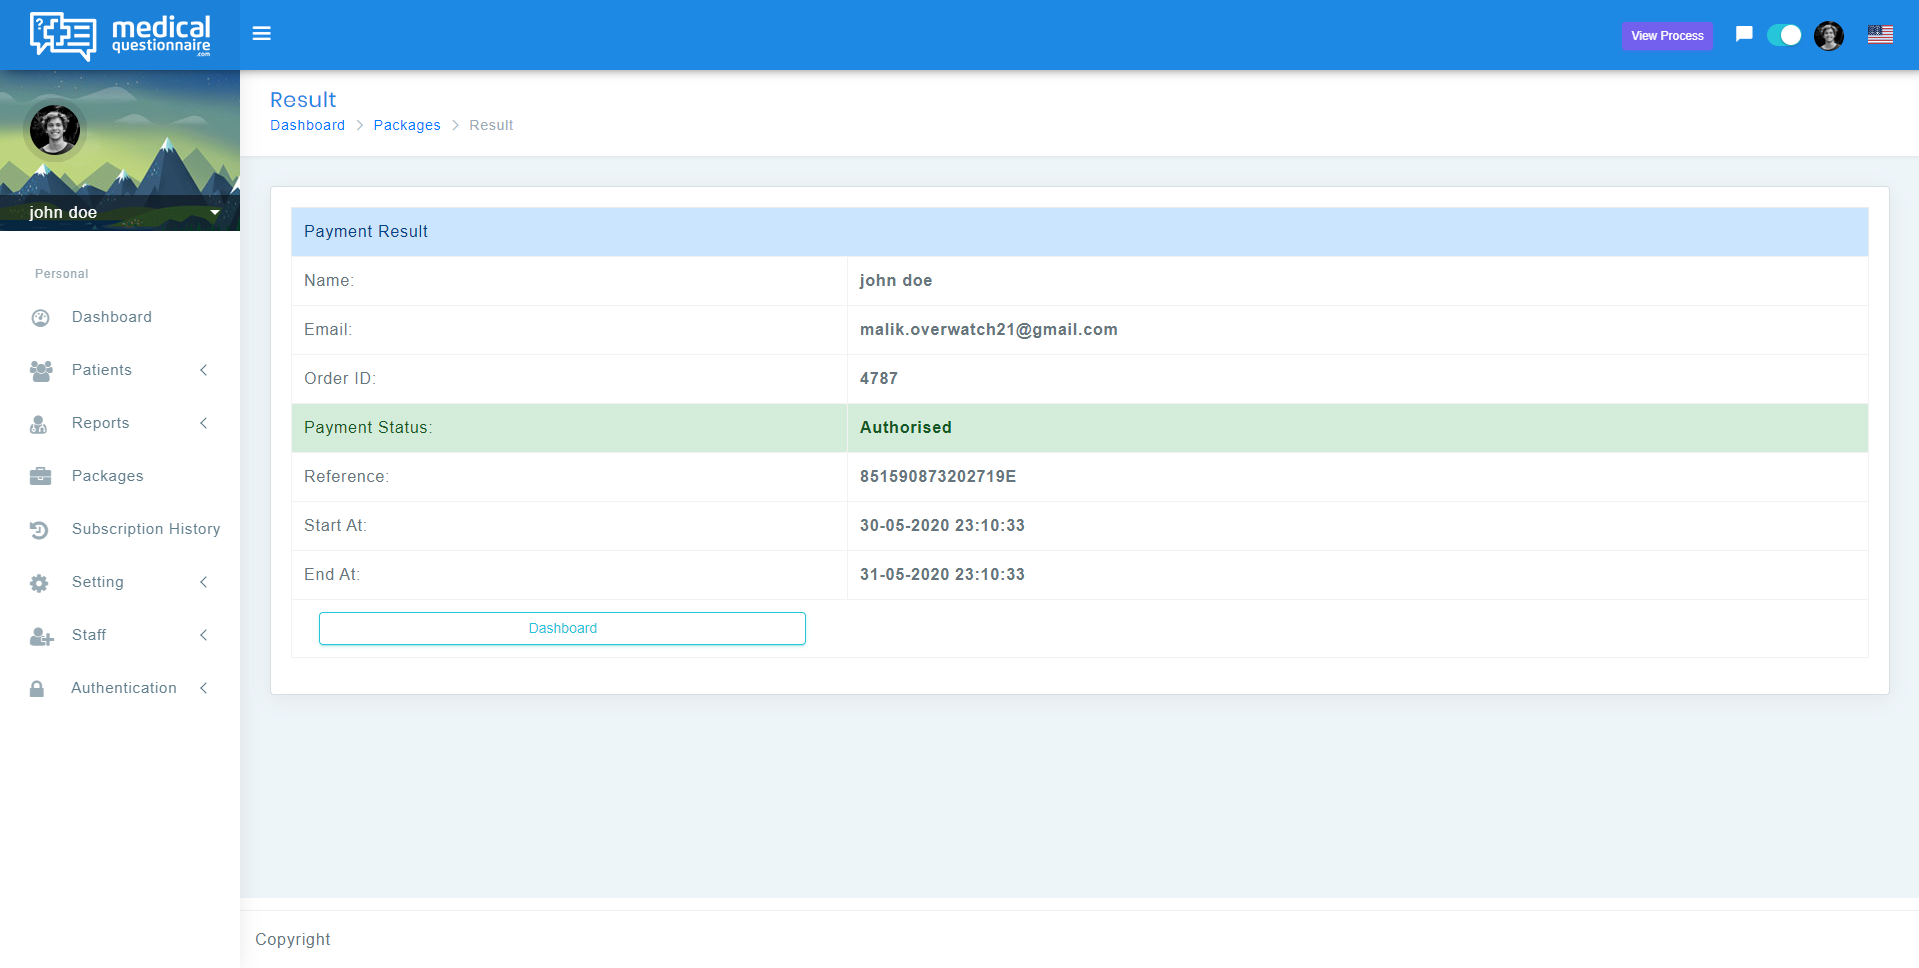
Once the payment is processed you will be redirected to the page where it will show the Transaction Details and it's status as follow
One the payment is successful, You are ready to use the MedicalQuestionnaire.We provide you two methods for inviting a patient to the MedicalQuestionnaire as well
That's quite similar how you signup your account using email system please follow the following steps to invite a patient using email feature. i. You just need to write en email with the following specified format and send it to " info@medicalquestionnaire.com ", by sending this email our system will create an account for the patient and also will invite him/her to the Questionnaire.
With the following example it will be more clear for you to understand the Email Format
Your patient will receive his/her login details along with a Random System Generated Password, after successful login with those details he/her will be redirected to a change password screen so that you can set the password.
Once you logged in to your dashboard you will see a tile with title " Add Patient " click on the button or Click Here
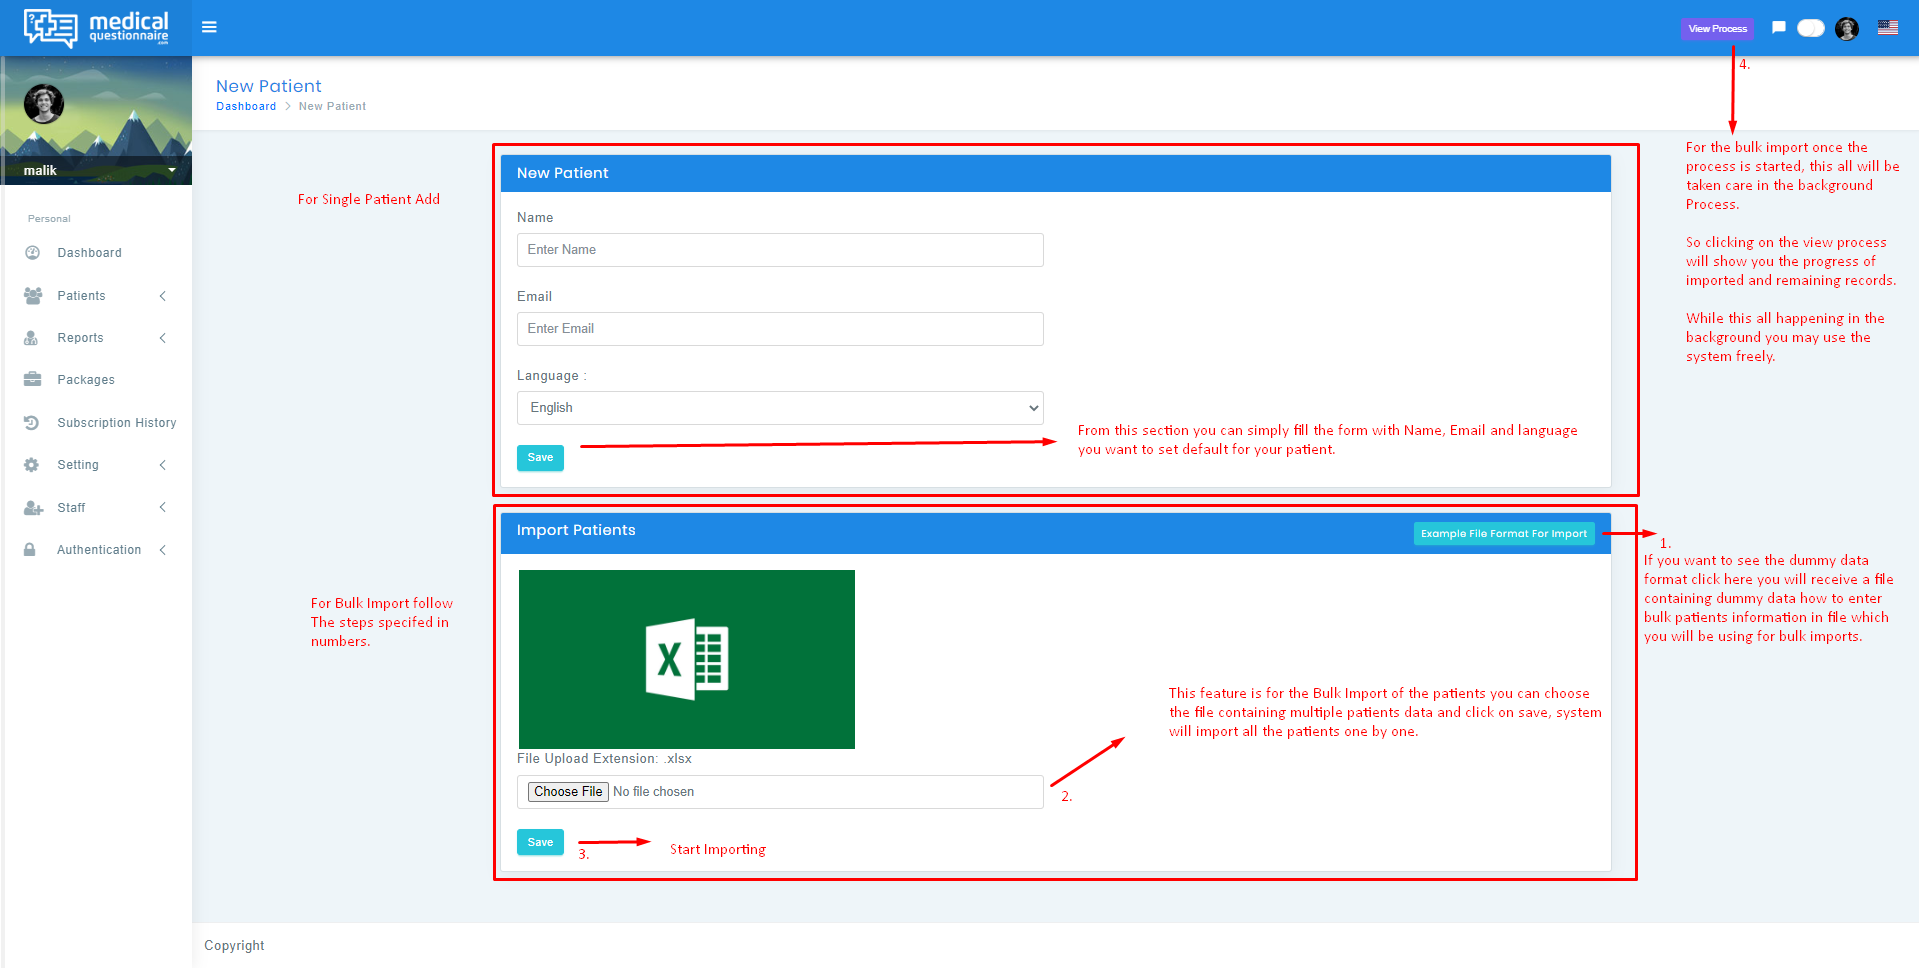
Once you are at the add page of the new patient you will see two sections there as shown in the following screenshot.
Follow first section as mentioned in the screenshot.
Enter Name, Email and select Language by default you want to set for your
patient.
Follow first section as mentioned in the screenshot.
You will need to know how to arrange patient's information in the file to import in bulk, we added a sample file for you follow the step 1 on the screenshot and a file will get downloaded which you can follow to fill up patients data according to the specified headers which needs to be followed as it is please don't Change the headers as this may cause problems in data.
Once you filled up the data into your file as per step one instructions, click on the choose button and select the file from your computer.
Once file is selected as explained in step two, click on save.
Your data will start importing in the background and while this all process you
can use MedicalQuestionnaire Freely that won't interrupt any of your activities.
You can track progress of your imports at anytime click on the 'View Process' as mentioned in the screenshot with Number (4) you will see how many records are imported and how many of them remaining.
We have various file formats support which you can find from your settings in left menu as shown in the following screenshot.
Once you click on the " Import Settings " from the menu you will see the following page.
you can change the import type for yourself and then go back to 'Add Patient' page and you will be able to use that import method for bulk importing patients.
How to Invite already existed patient with your account or Resend The Request to fill up the Questionnaire ?
Once you login to your dashboard you will see the following tile as shown in the screenshot:
Once you click on this button you will see a POPUP as follow:Here you can enter the email address for the patient, this is smart search as you will start typing the email it will fetch you the similar existing patients in the list you can select from them and then select the Questionnaire Group and click on 'send'.
Your patient will immediately receive a request to fill up the required questionnaire.
On your dashboard you can find the tile with title 'patients' as show in the following screenshot.
Once you click on the 'my patients' button on the dashboard you will be redirect to the detailed page as follow where you will be able to view all reports of your patients records with various filters and search capabilities, Also you can view reports, edit and delete from here as explained in the following screenshot with arrows.
On your dashboard Or Left Menu ( Reports -> all reports ), you can find the tile with title 'patients' as shown in the following screenshot.
Once you click on the 'my patients' button on the dashboard you will be redirect to the detailed page as follow where you will be able to view all reports of your patients records with various filters and search capabilities, Also you can view reports,delete and resend from here as explained in the following screenshot with arrows.
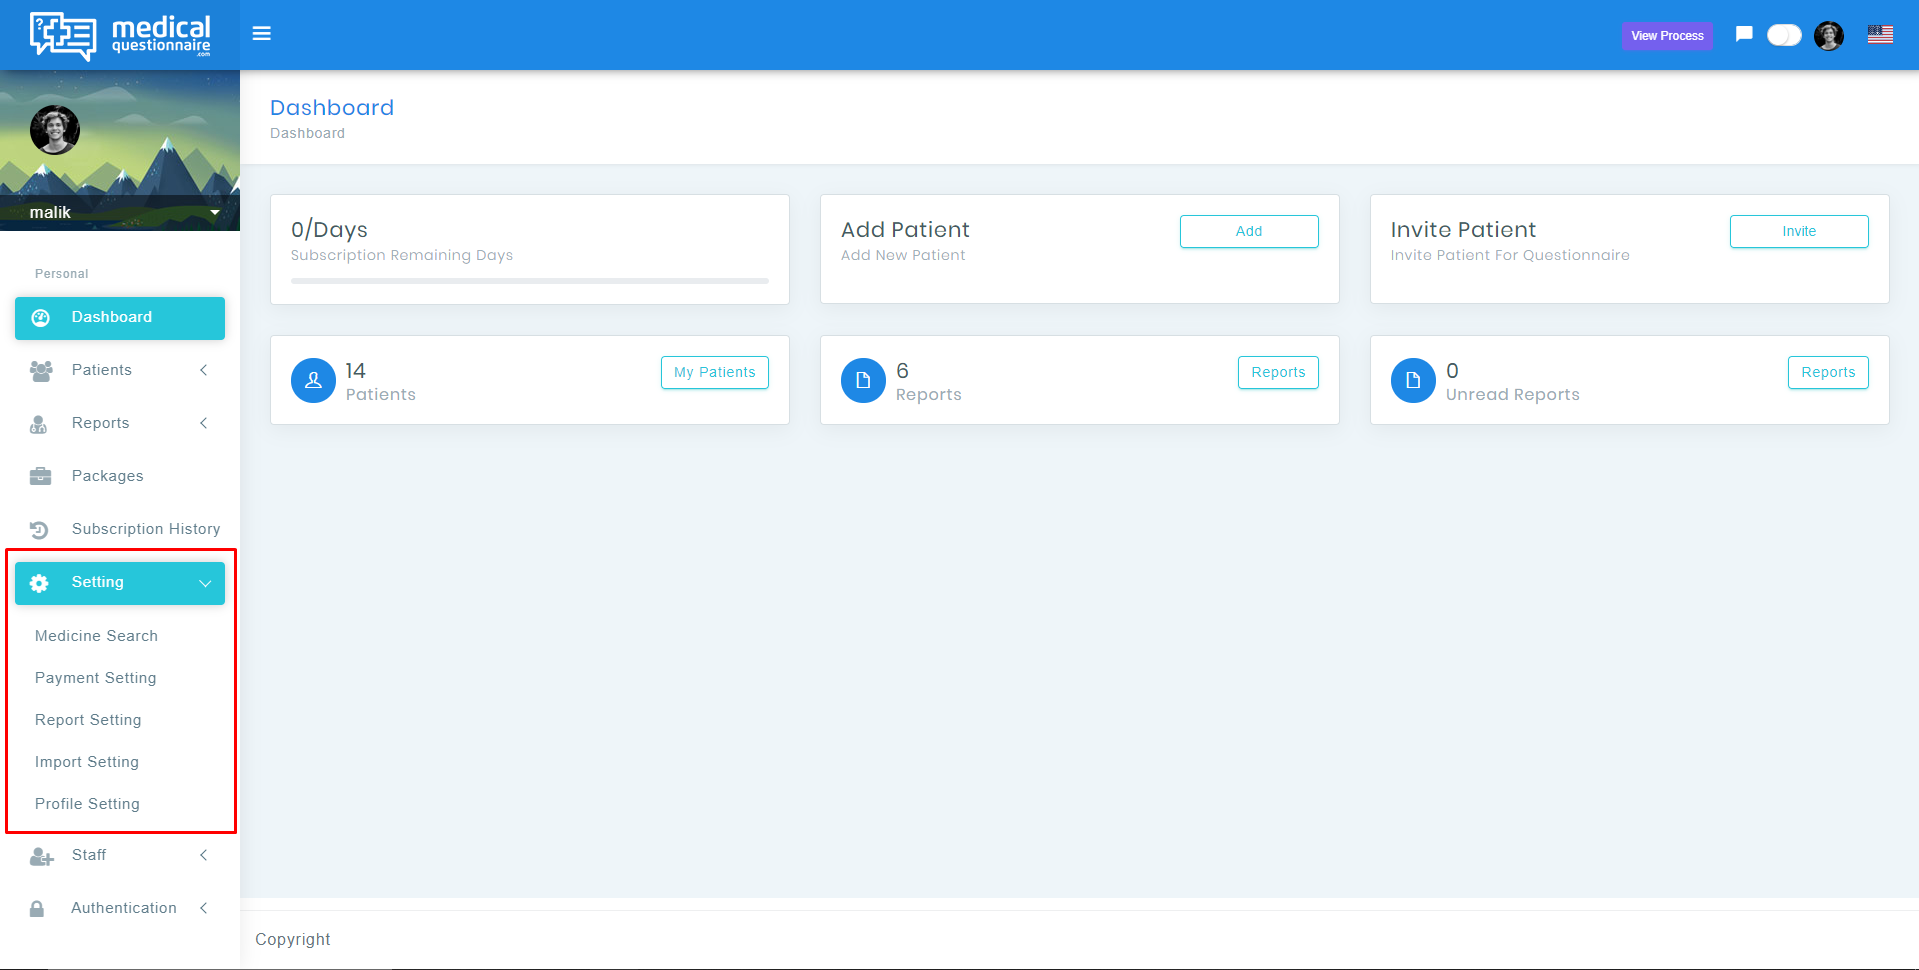
The Settings link can be found in left menu easily once you click on it you will be able to find further more links of settings you can adjust for your account as follow:
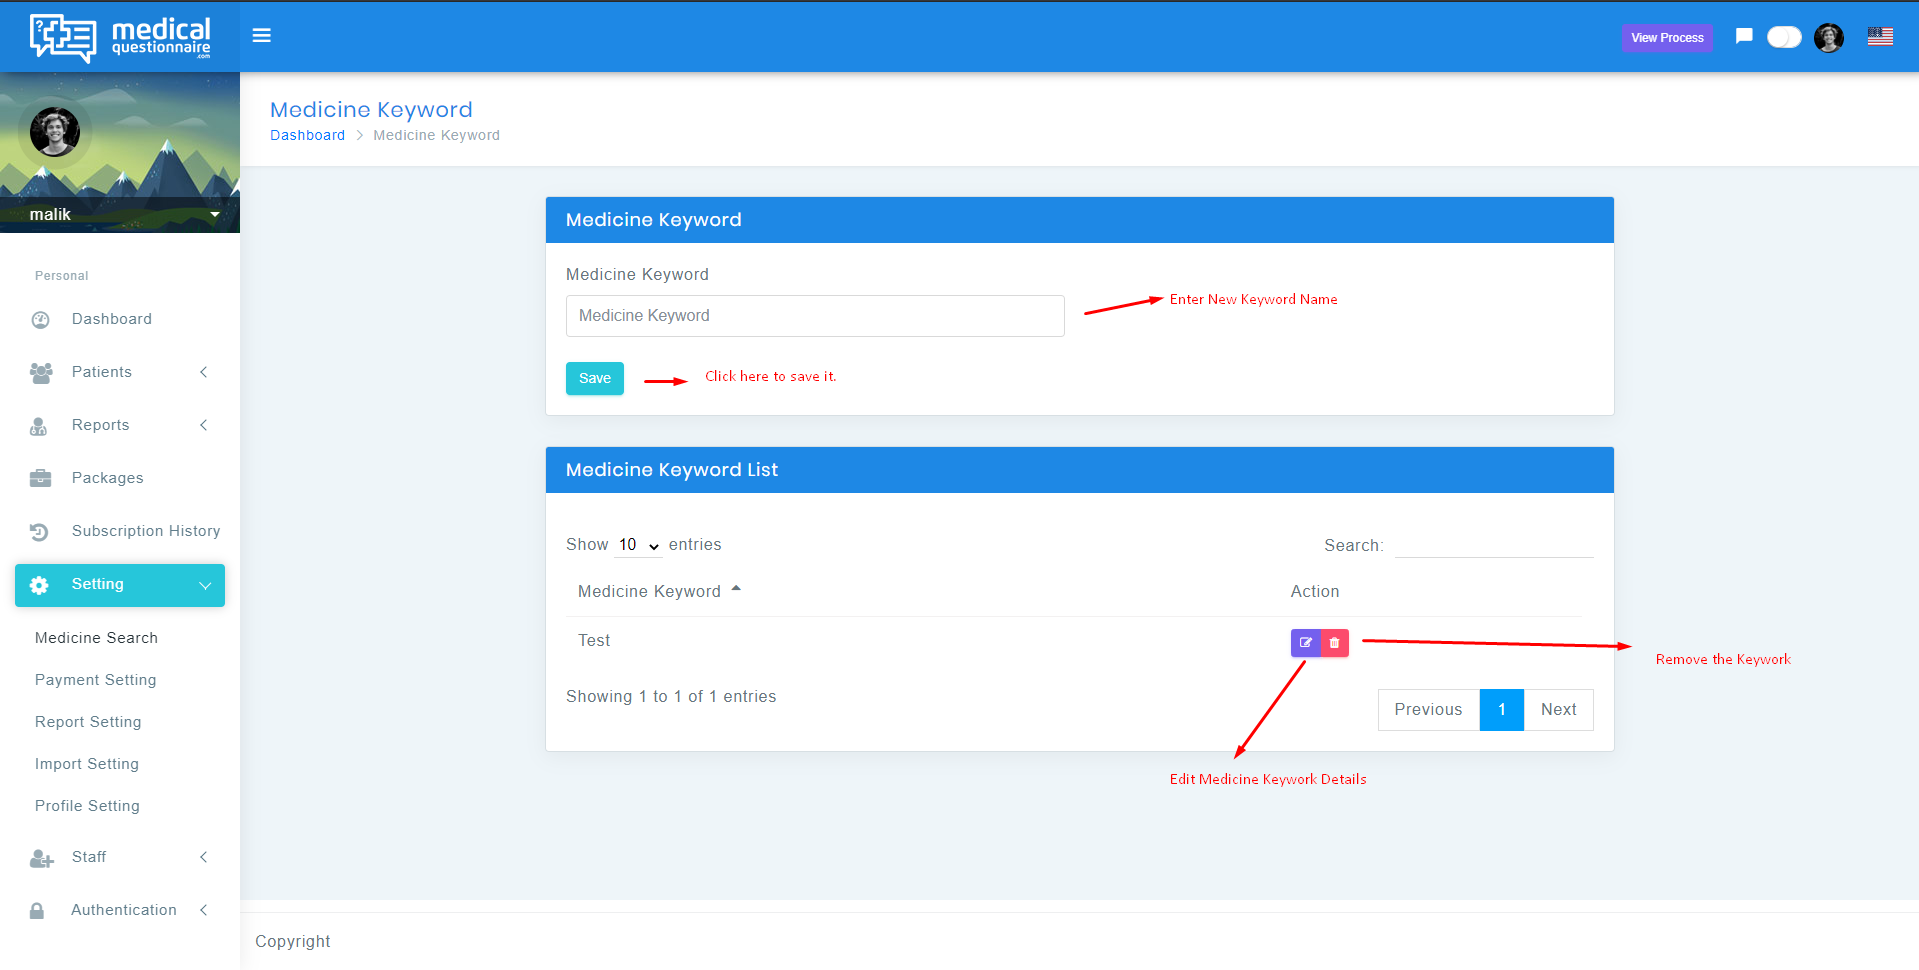
If you click on the Medicine Search Link as displayed in the above setting screenshot, you will see the following view:
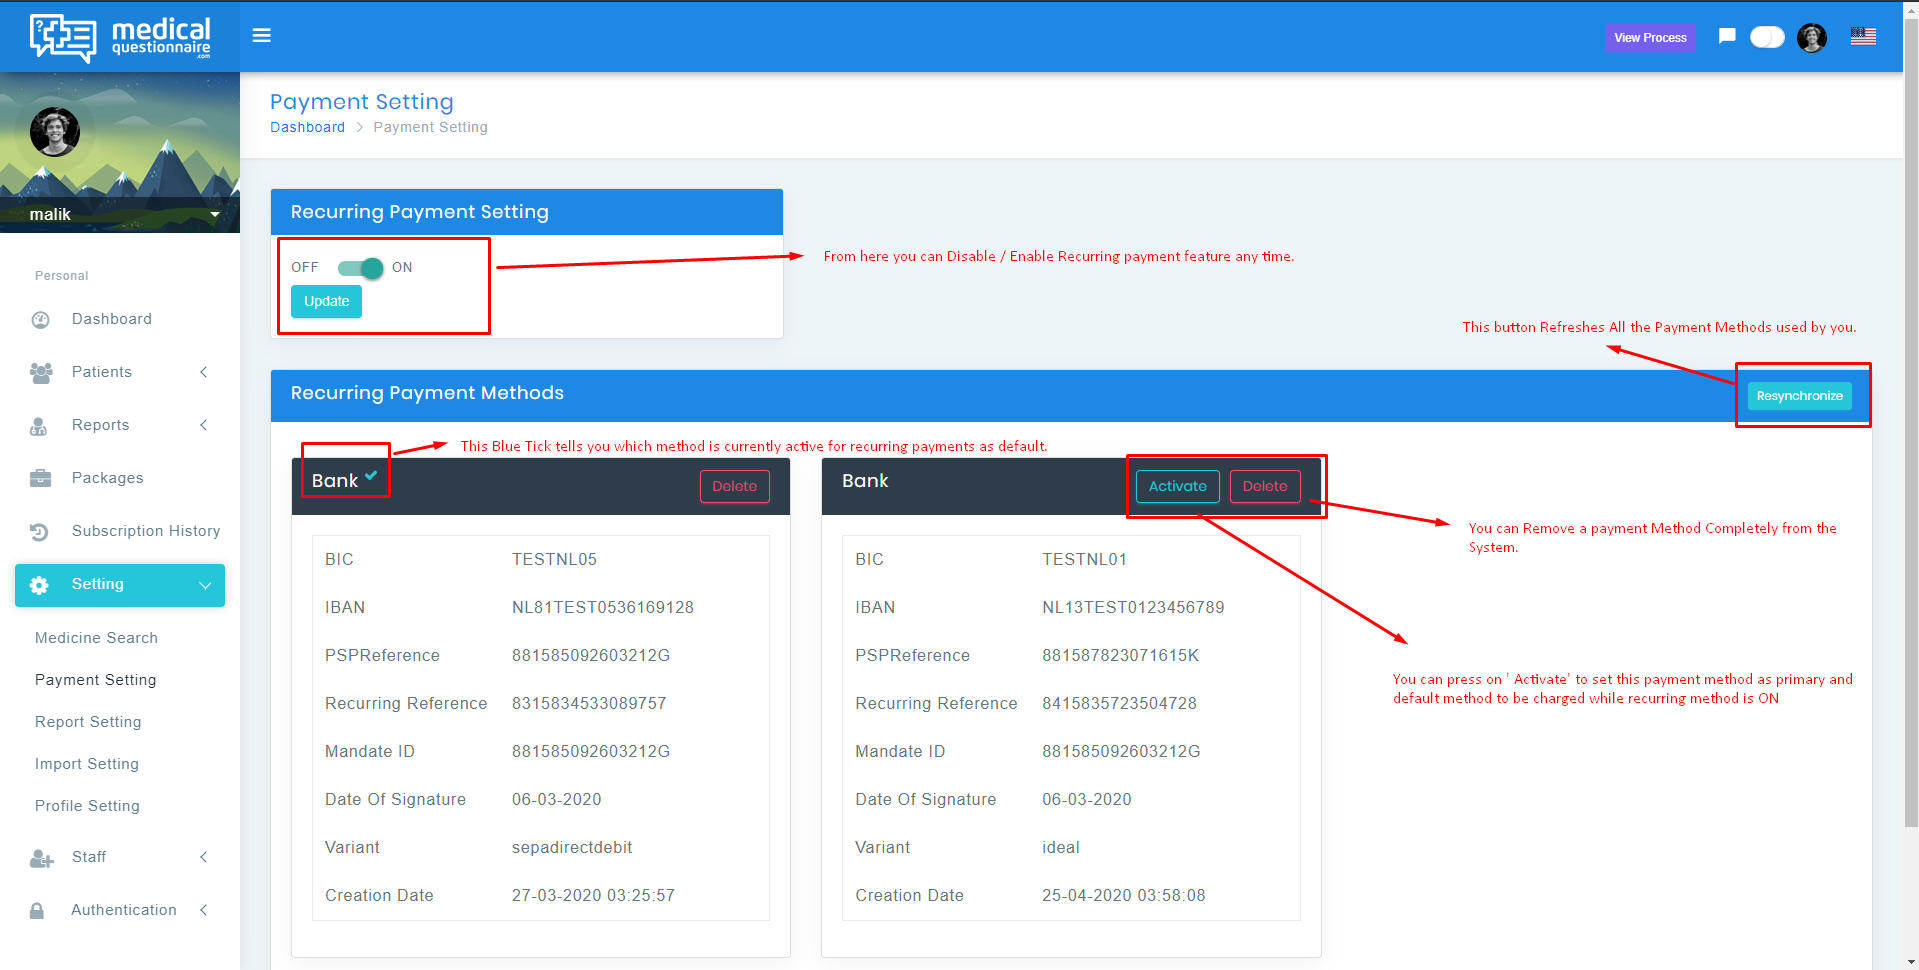
If you click on the Payment Settings Link as displayed in the above setting screenshot, you will see the following view:
Following Actions can be performed from this area.
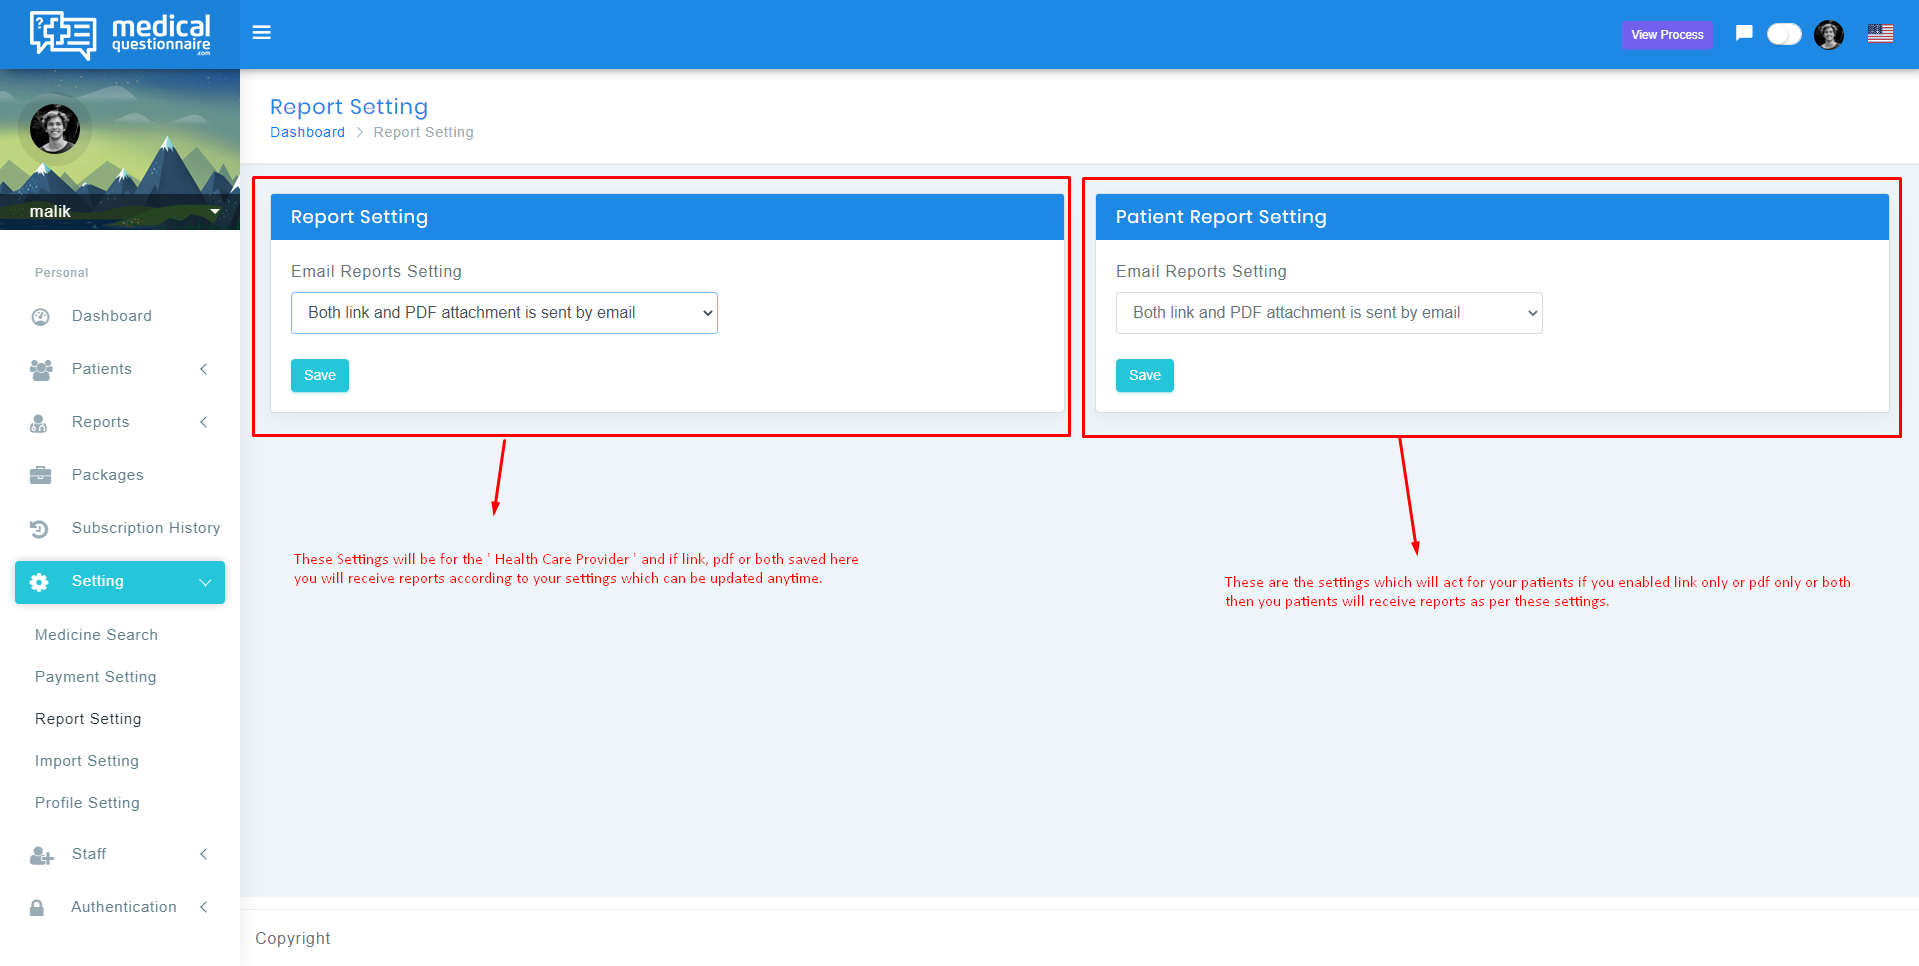
If you click on the Report Settings Link as displayed in the above setting screenshot, you will see the following view:
We have various file formats support which you can find from your settings in left menu as shown in the following screenshot.
Once you click on the " Import Settings " from the menu you will see the following page.
you can change the import type for yourself and then go back to 'Add Patient' page and you will be able to use that import method for bulk importing patients.
Changing import type from settings will set that method default for your ' Import Bulk Features in Add Patients Section ' As explained in it's relevant section above.
Here you can change your personal details, once you do press the 'Submit' Button.
We provide you to manage your staff
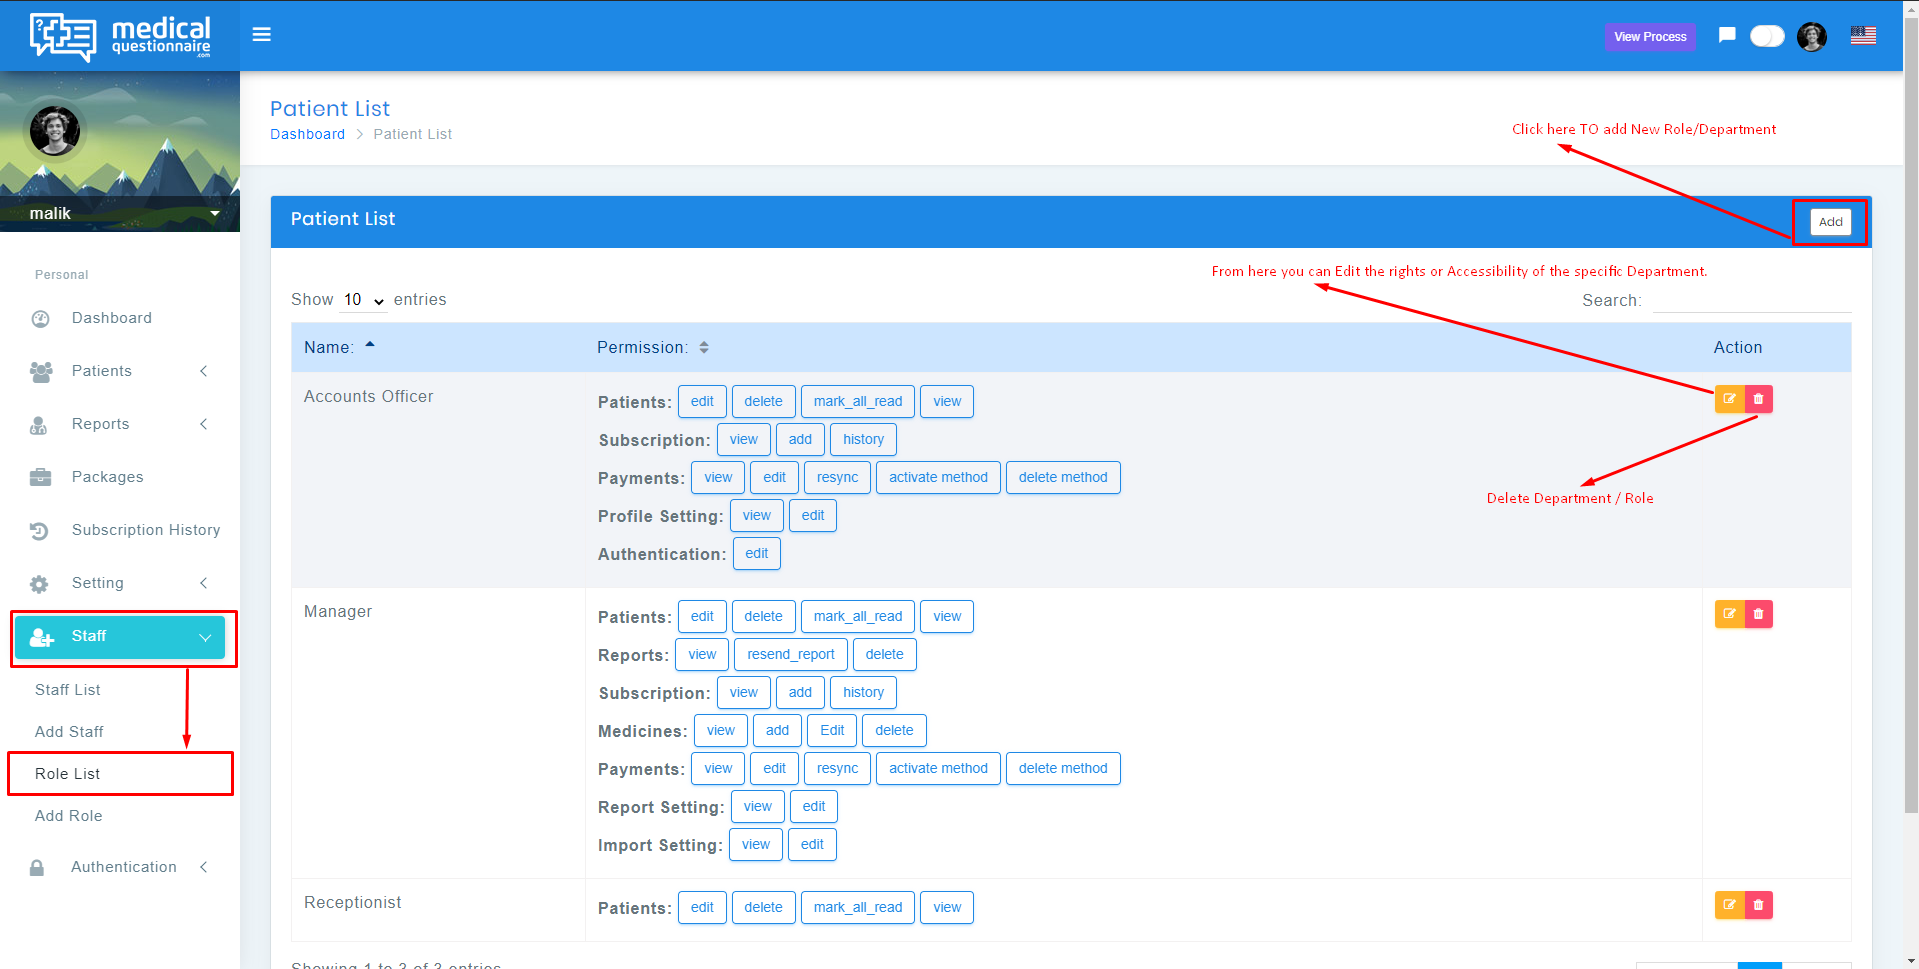
From the left Menu Staff -> Role List
There you can find list of all Roles where you can edit their accessibility and
rights what action must be allowed or disabled for the specific group of staff
members
There are various actions you can perform from this page are as follow:
When you will click on the ' Add ' Button from the Staff -> Role List
Staff -> Add Role ( that's shortcut for the same page)
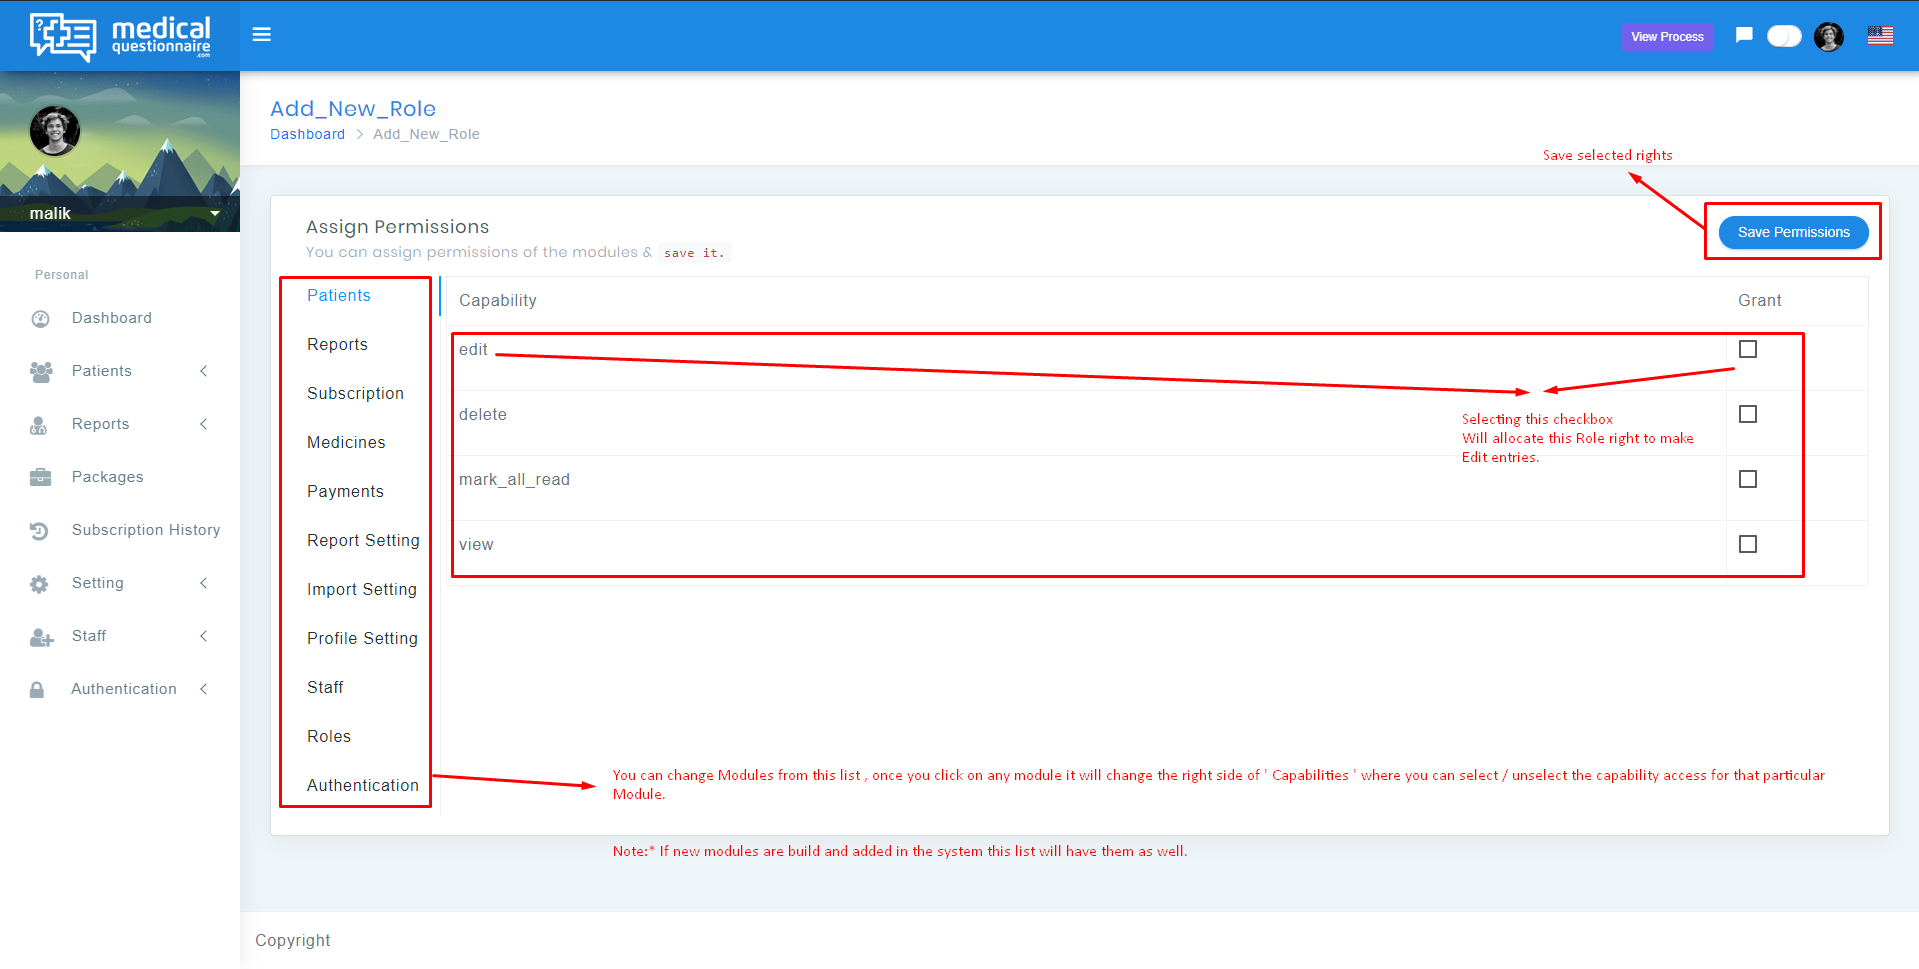
Once you click on the Add Role you will be on the following page:
Once you enter the name of role and hit save button you will be redirected to the following screen where you can choose which rights needs to be allocated to the Specific Department / Roles or Group of people from staff.
Here you will be able to manage selective rights for particular module for the role you just added above, After change those roles you need to hit 'save permissions' button as shown in the screenshot above.
When you click on the edit button you will be redirected to the rights screen as follow:
Here you can change the permissions as you want and hit save, permission for that edited group will be updated for the staff members who had those roles.
When you will click on the ' Delete ' button you role will be deleted and access level to the users who were having that role will be set as 'no permission' mode for them, so you will have to assign those users another role in future to let them access the dashboard if you want.
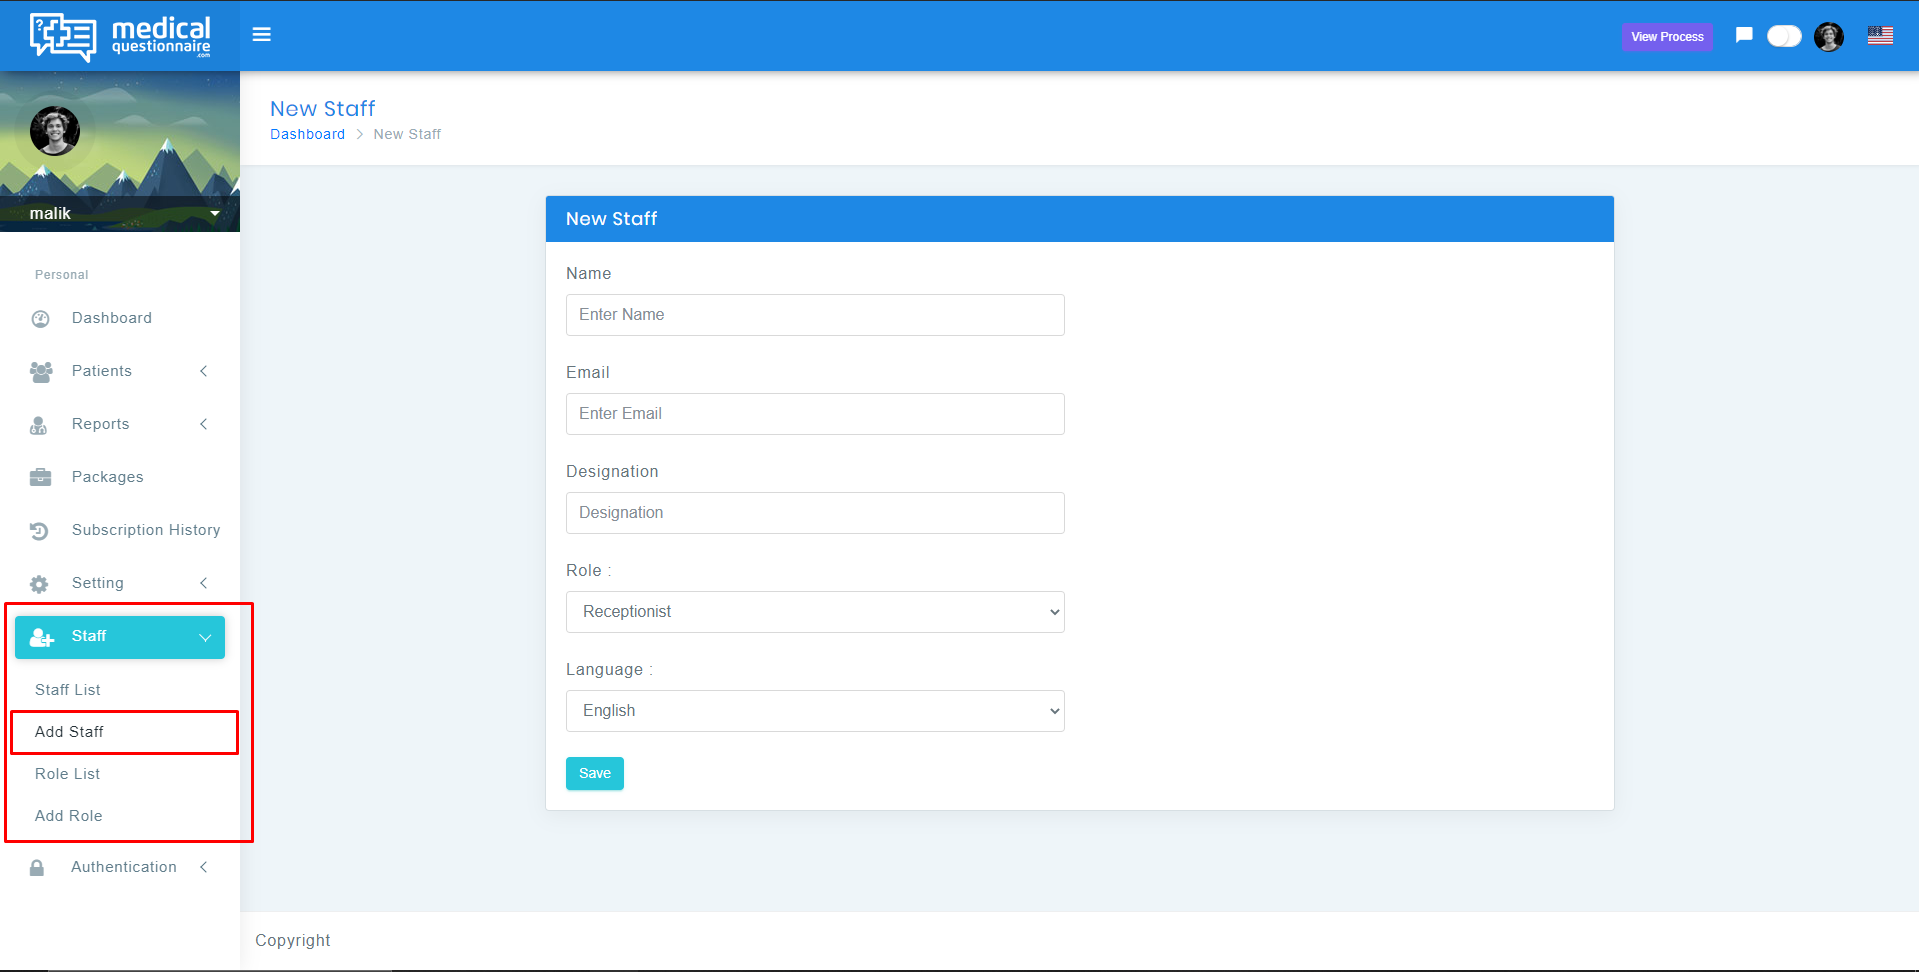
If you click on the Link in left menu from staff -> Add Staff you will see the following screen:
Here you can add user details and select the ' Role ' From the Dropdown which you will be allowing them.
As soon as you hit the save button those staff members will receive Login Information on the entered email address for their access to the MedicalQuestionnaire.
They will be using the same Email Account of their Administrator but the password they will be using is unique which is sent them to their email accounts.
If you click on the Link in left menu from staff -> Staff List you will see the following screen:
Here you can perform following Actions:
To add new staff as explained earlier in previous section
Once you press the edit button you will see the following page with the staff details which you can change as follow:
You can delete any staff member.


